Drywall Installation Tips
The more you know about installing drywall, the more you will want to do it.
It is a skilled trade, but that doesn't mean the do-it-yourselfer
or the handyman can't obtain quality when hanging the board.
Get the most from the right size sheet: from the brand you
trust. And size with the biggest practical sheets you can. This will cut down
on finishing efforts and reduce the lineal footage of seams. While making cuts,
pay attention to the side tapers molded into the sheet, at either long edge.
Place this to abutt another along tape seams. And don't end off these shallows at door jambs,
windows openings and baseboards. Here there needs to maintain a constant level for the joinery to match.
Execute cuts, drill screws, and transport the sheets about
the job site efficiently. Shedding the grunt labor as much as you are able will
free up your efforts so you can concentrate on the actual skill-set required.
Running a newer drywall gun loaded with screw cartridges speeds the installation
by making the fastening of drywall onto studs continuous, not so constantly
stopping to reload each and every individual screw in the chamber. These are
available at the major home centers. After screw fastening, checking for any raised heads
cuts down on stopping and starting with the mud phase.
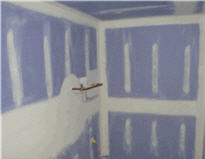
Install the wallboard beginning with the ceiling, and go downward.
Normally, hang the sheets in a complete phase, and phase the taping and finishing and then sanding.
Make liberal use of your rasp. It not only enables the sheet
to fit, but helps with proper seaming and dry times in the event of large width
discrepancies.
Be aware of angles other than 90 degrees. They will require
special finishing. But don't stay away from irregular angles because they are
difficult. The widespread walls just as well show just how adept you are at finishing angles.
Making cut and misplaced screw corrections: Do not break through
the drywall membrane, or paper, unless it is necessary.
Allow proper dry times. Coating before the prior mud
is set and dry can result in extended dry cycles, resulting in cracking and finished
joint-failure. Apply compound when setting the air temperature to at least seventy degrees
if possible for drying, but not too hot.
Clean up demands that there be a good source of water at the
jobsite. Bedding mud or skim coating only for a few moments will provide proof
that all tools, certainly your broad knives and pan, must remain without particles picked
up from the wall or elsewhere. Whether you are fortunate enough to have a drywall pump or go straight
out the 5 gal container, keeping a lid on it will contribute toward this goal.
If you are hot mudding, this concept is vastly true. Even certified
drywall specialists are well aware of its brief work times.
First Runs: Given the opportunity, apply your efforts to an
inconspicuous area such as a storage area. One that is out of plain view.
Finally, every now and then take advantages of opportunities for hanging wallboard
to always refine your skills.